
Microblading in San Diego

Microblading is an Asian technique, which further evolved in Europe, used to give eyebrows a naturally full appearance. Skin by Sarah offers a highly effective procedure for perfecting eyebrow microblading in San Diego which involves a specialized disposable tool that draws on highly realistic strokes of hair. The semi-permanent procedure is suitable for all skin tones. The perfect candidates for San Diego microblading are those dealing with thin eyebrows, over-plucked eyebrows, or hair loss. However the service is also suitable for those simply unsatisfied with the shape or look of their brows.

The process begins with measuring the symmetry of the face to ensure evenness of the brows. Next comes the outlining of the eyebrows to create the ideal shape. A manual pen equipped with sterile blades gently draws on the hair much like a tattoo. Based on lifestyle, skin type, and sun exposure the short process can be effective up to 3 years. Touch-ups for our eyebrow microblading in San Diego, CA are recommended once a year.

Eyebrow Microblading San Diego Procedure

Preparing for your eyebrow microblading procedure is the first step in the process. Before your appointment:

  • DO NOT pick, tweeze, wax, or perform electrolysis one week before the microblading eyebrows procedure.
  • DO NOT have sunburned skin or long unprotected exposure in the sun within two weeks of the procedure.
  • DO NOT have a facial within two weeks of the eyebrow microblading procedure.
  • DO NOT have botox injected within three weeks of your procedure.
  • DO NOT exfoliate or have any Microneedling done within two weeks of Microblading.
  • DO NOT take Niacin within one week of the procedure.
  • DO NOT take any blood thinners, including Fish Oil or Vitamin E, within one week of the procedure.
  • DO NOT wax or tint your eyebrows within three days of the microblading brows procedure.
  • DO NOT workout the day of your procedure.

In order to avoid excessive bleeding and poor color deposit:

  • DO NOT drink alcohol 24-48 hours before your procedure.
  • DO NOT drink coffee before your procedure.
  • DO NOT take pain relief medication such as Aspirin or Ibuprofen (blood thinners).

Before your appointment you will be charged a non-refundable $50 consultation fee. Clients seeking Microblading in San Diego are subject to approval.

On the day of your appointment you will be required to fill out a consent form and provide a copy of your ID. Before and after photos will be taken for our portfolio, with your consent the photos will be posted on our site and used for other promotional purposes.

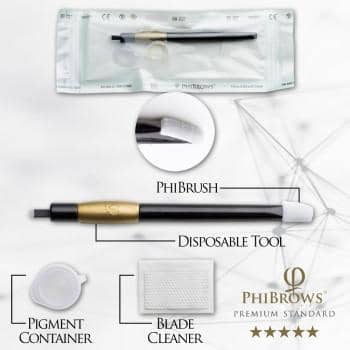
Next we will begin to draw on your eyebrows based on your desired look, face shape, bone structure, and other facial characteristics. Please keep in mind that your eyebrows are not meant to be absolutely identical to each other, instead they will be enhanced with the tools and techniques we use to provide the most realistic and natural look. Once the shape is approved and the design is agreed upon, the microblading will begin. The first pass will be done without numbing cream so we can outline and create the brow frame and mask with ink (you may feel like sneezing during this which is a common reaction).

While masking one brow, I’ll be drawing on the second brow and numbing cream will be applied to the first brow. At this point you may feel minimal discomfort. Each stroke will be repeated several times to ensure that the ink adheres properly. If necessary, shading will be applied after the strokes to give more density and make the eyebrows look more pronounced. We will check your brows together to make sure you are completely satisfied with the shape of the strokes.

After the appointment a copy of aftercare instructions will be provided for you. Please keep in mind your eyebrows will look darker on the day of the procedure and will slowly lighten over time. The eyebrows can fade after completely healed, pigmentation loss varies. Redness is normal and will go away after a few days. After-procedure care is essential to protect the look of the brows. Remember the acronym AWM, which stands for Absorb, Wash, and Moisturize!

We recommend that you book your touch-up appointment while you are in for your procedure. The touch-up procedure should take place four to eight weeks following your first Microblading procedure. The touch up treatment is to replace any brow strokes you may have lost (it could be up to 50%).

After you have gotten your beautiful brows done, it is important that the pigment is sealed into the skin. The percent of retention is related to the aftercare and is based on skin type, technique, age, lifestyle, health conditions, and medications.

After-care instructions:

  • 30 minutes after the treatment you must wash your brows with warm water and neutral face wash (ph level 5.5) then apply cream.
  • After the first wash, repeat process every 2 hours (if you have oily skin every 1.5 hours) for the next 24 hours,
  • For the first 24 hours, apply the wax (provided by Skin by Sarah) after every wash.
  • If you had your eyebrows done in the evening, just wash once before bed and immediately the next morning to continue the aftercare.

After the first 24 hours, wash twice a day in the morning and evening like you would do for a normal daily routine. Apply the cream after washing your face or after the shower. For dry skin, it is recommended to use a thin layer of cream five times a day. For normal skin, use two times a day or as needed. For oily skin, dry healing would be the best option (use a thin layer of cream if area begins to feel dry). Washing frequently reduces the chance of scabbing.

  • DO NOT touch or pick your brows.
  • DO NOT apply makeup on top of the brows until heals.

Remember, your eyebrows will look dark but fade 10% to 50%

  • DO NOT use other ointments, cream with vitamins or antibiotics on eyebrows during the healing process.
  • DO NOT go sunbathing or tanning in direct sunlight for 4 weeks.
  • DO NOT use retinols, AHA’s, exfoliating treatments, chemical peels, microdermabrasion, botox and any other strong treatments for 6-8 weeks after your procedure.
  • Smoking WILL cause the pigment to fade prematurely and anesthetics will not last as long.
  • DO NOT use growth enhancement products such as RevitaBrow, GrandeLASH, one month prior and after treatment has fully healed as it may shift your color.
  • DO NOT wax or tint your brows for 15 days or until the wound is completely closed.

Skin by Sarah cannot guarantee your final results. Results are based on how your skin heals and accepts the pigment. Results vary by individual, however, if you follow your aftercare instructions, most procedures are very successful.

Healing

Showing the results just immediately after a procedure is not the same as showing the entire process, and can leave clients with A TON of questions about their healing process. The procedure itself is only about 10% of the true microblading experience. The 30-60 days afterward contributes a large part to what the results will look like. Read the following to learn what you can expect during the healing process.

Day 1

On the first day, you may be excited but shocked by the transformation. Your brows look defined, fuller and they change your expression! Once you leave they can be a little bit red, but it’s a world of a difference. The color will be bold. If you aren’t used to filling them in a lot, they will look slightly more dramatic in appearance than normal. Your brow area will be tender, slightly swollen, and you may even experience some slight bleeding. But once they are healed you will be in awe of your fantastic new brows.

If you normally fill in your brows and are familiar with the bolder look, you may be in love. If not, do not panic. The permanent makeup has been applied to compensate for fading of 20-40%, so if they look darker than you normally wear your brows, stay calm, the color will fade over the next week.

Healing

Day 3-4

Day 3, you shouldn’t notice a huge difference from the previous two days, if anything, the pain and tenderness will start to subside and the brows will get slightly dark or thicker. At this point, you’ll probably be loving the convenience of getting up and having instant brows without the hassle of having to create them yourself. You’ll likely find yourself daydreaming about beach days with completely waterproof brows, but don’t act on this at LEAST until day 10!

Day 5

Day 5 is when things start to change. This can be the turning point in the healing process, where your brows are getting itchy and it is advised to NOT scratch them as the wound may still be open. A thick layer of scabbing may form, and the fine hair-strokes that were created may be hidden. You may feel like you want to start panicking. RESIST the urge to blow up your artist’s phone, firing off questions and accusations alike. You have a wound on your face, therefore your body is trying to repair itself, hence the scabbing. It’s all apart of the healing process, and if you’ve had any other kind of tattoos in the past, it heals very similarly.

Just know that this is totally normal and even if it doesn’t look pretty, you shouldn’t worry, they’re going to be #browgoals again in no time.

Day 5-7

This is a scary time period, when the serious scabbing will start and begin to peel away from the skin. If you’re anything like me – you will be extremely tempted to pick or peel the scabs. Do not give in to this temptation! It could affect your healing very negatively. If you pick at them, you could lose pigment that was deposited into the skin and could end up with patchy eyebrows. By gently rinsing the area regularly the scabs will slowly start to fall off – when they’re ready. This phase is definitely the hardest of the process. Clients may look on social media and tell themselves: “I haven’t seen anyone talk about or show this side of the microblading healing process. All we see is perfectly fresh strokes, but scabbing? Who knew your entire eyebrow would shed and go through this transformation?” It’s so important for clients to know and truly understand the whole process, and really be assured by their artist that what they experience is perfectly normal, and necessary for their eyebrows to heal properly. In the end they will have the brows they always wanted.

Day 7-10

At this point, your scabs will probably be all flaked off or flaking off on their own and you’ll start to see the light at the end of the healing tunnel. But, because the skin has not completely mended itself back together, proceed with caution. The color during these days may seem way too light or even gray and missing in spots. You might feel like your skin didn’t take the pigment, but that’s not the case. They’ll almost look like you’ve filled them in with a powder, so again just remain as calm and begin to start enjoying the fact that your eyebrows are already done for you every morning. It’s important to note that at this stage that the wounds should be closed, so if you’re feeling self-conscious about the look of them you can apply makeup to fill in for the time being. From there you can count down the days until your touch-up appointment for microblading in San Diego.

Microblading Pros and Cons

As with any cosmetic treatment, there are pros and cons of microblading. Some restrictions include medical conditions, medications, combined treatments, and skin conditions. Candidates not currently eligible for microblading include, but are not limited to:

  • Those under 18 years of age
  • People with diabetes
  • Pregnant and lactating women
  • People with glaucoma and people who are taking blood-thinning medicines, e.g., aspirin.
  • People with skin diseases such as psoriasis, eczema and undiagnosed rashes or blisters on the site that is to be treated.
  • People with allergies to makeup or pigments
  • Those with easily triggered post-inflammatory hyperpigmentation
  • Those with transmittable blood conditions like HIV or Hepatitis
  • Those that have active skin cancer in the area to be tattooed
  • Those that have healing disorders, are currently taking blood thinners, have uncontrolled high blood pressure or have mitral valve disorder.
  • Those on any skin medication such as ro-accutaine or steroids.
  • Those that have eyebrow hair transplants, excessive bleeding, or an autoimmune disorder such as lupus or frontal fibrosing alopecia.
  • Oily Skin isn’t the best skin for Microblading retention. We offer other solutions, such as a combination of Microblading and shading or Powder Ombre Brows.

That being stated, microblading is ideal for those with dry to normal skin types. It is a long-lasting solution that does not require constant maintenance and the results are waterproof, eliminating the need for makeup. This specific technique does not require an electrical current, which means no vibrations, allowing the pigment to be implemented precisely and look natural. It is a quick, safe, painless, and effective procedure that only lasts 2 to 3 hours.

Let us know if you have/had allergic reactions to topical anesthetics or any other topical or oral products.

Other restrictions:

  • If you are using any type of exfoliation as AHA’s (lactic, glycol citric, retinoid and tartaric acids) or any OTC creams and lotions for tone correcting, anti-aging, exfoliating, fading can discolor your permanent makeup.
  • Flu or Cold: Please stay home, reschedule your appointment if you have a cold or the flu or sinus/respiratory infection.
  • Coumadin: The amount of bleeding and response to topical epinephrine will determine coverage per appointment. If excessive bleeding occurs, extra appointments may be necessary for the desired outcome or the procedure may not be effective.
  • Cancer/Chemotherapy: Doctor’s clearance may be necessary.
  • Laser eye surgery: Wait about three months for eyeliner procedure. All other permanent makeup procedures are ok.
  • Juvederm or other “fillers”: Have the permanent makeup procedure first or ask your Juvederm tech for clearance.
  • Shingles (varicella): If you have shingles on your face, wait several months to get permanent makeup.
  • Eyelift or blepharoplasty: Wait about three months.
  • Eyelash extensions: AFTER permanent makeup, not before. Or remove them before your procedure.
  • Pinkeye: Do not Microblade or have any other semi-permanent makeup procedure until your infection has cleared and your prescribed medication has been completed.
  • Cold Sores: Clients with a history of cold sores need to premedicate with an antiviral drug (Zovirax, Valtrex, or Acyclovir) prior to a lip coloring procedure.

Microblading with previous Permanent Makeup

Clients with previous Permanent Makeup are considered to be more challenging to work with when Microblading. Once you have an eyebrow tattoo, it limits design process since the tattoo must be worked around. The perfect shape may not be able to be created.

In order to use the Microblading technique the brow must have some negative space where the hair strokes can be drawn. The tattoo color will not be covered up by the hair strokes.

Another thing to consider is scar tissue. Depending on the artwork, the brow area most likely developed scar tissue which makes the skin harder to scratch resulting in a lower chance that the pigment will be retained.

Faded brow tattoos are easier to work on as long as the pigment does not appear red or purple (tattoo color can change over time).